Say hello to pie season!
You don’t have to be a skilled pastry chef to master these pie crusts. In fact, these are pie crusts for the “rest of us” – and all 8 pie crusts will turn heads this holiday season. If you brought a sad strudel last year to dinner and most of your pies are a disaster, follow these tips.
Cookie cutters and stencils are not required! We’ve made sure to use utensils –
like forks! – everyone has easy access to, and the patterns can literally be made from paper or cardboard. And homemade pie dough? Nope! We used ready-made pie crusts for all 8 pies.
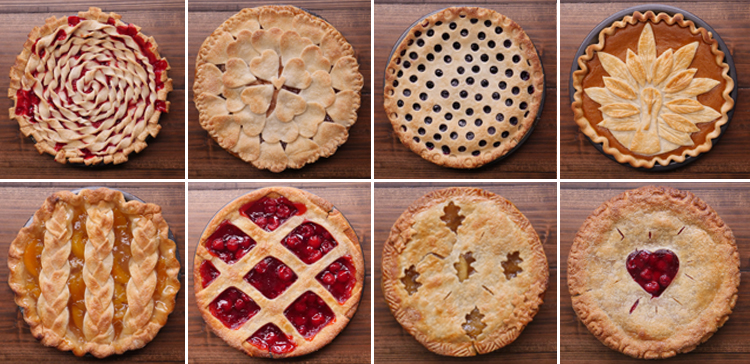
Pie Crust 8 Ways
Use Ready-Made Pie Crust
-
Supermarket pie crusts come in two styles: rolled crusts that you press into your own pie tin, and crusts fitted into aluminum pie plates.
-
We prefer the rolled style, which are typically – and luckily! – sold in sets of two.
-
You can use a knife or kitchen shears to trim the overhang so it’s 3/4-to-1-inch around the pie.
Tools
-
Scissors for trimming around the pie, as demonstrated in the video. Kitchen shears are also great for trimming pie dough.
-
Cookie cutters are great if you already have them. You can also make stencils or patterns – like our turkey pattern! – out of paper or cardboard.
-
Cool-looking keys. Check out your local antique store and dig through their drawers for fun patterns.
-
Only. One. Fork.
-
A pizza cutter (or a paring knife) for strips!
-
A pastry tip (or anything small and round) for the honeycomb pie crust.

8 Techniques! Let’s Dive In.

-
Key to My Heart Crust
All you need to do to make this one is take your fancy key, and work your way all around the pie with the edge of the key. By rolling the dough under the pie plate rather than just folding it once, you create a higher edge, which gives you a little more to work with when you’re crimping.
-
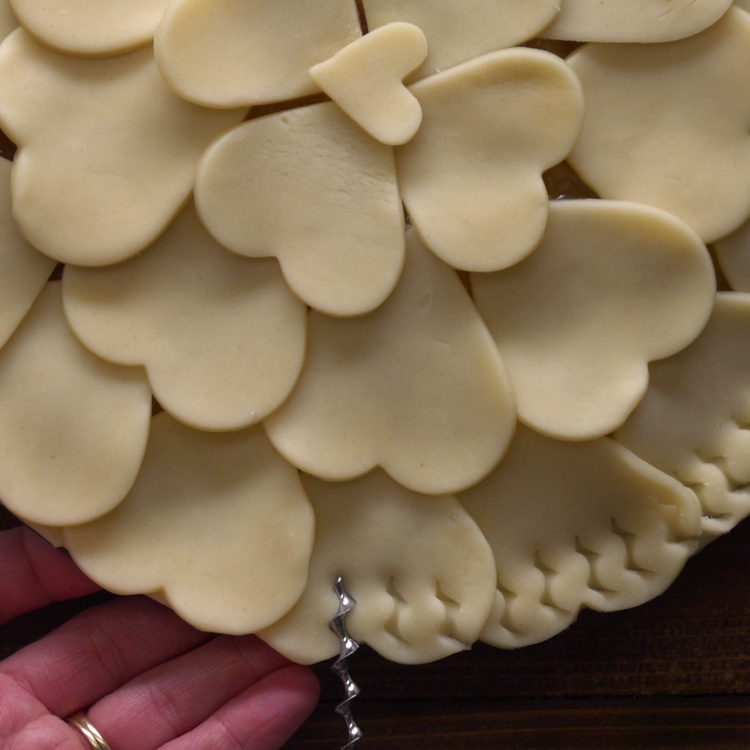
I Heart You Pie Crust
Lay heart-shaped dough cut-out’s from outside to inside on the top of a pie until completely covered. If desired, use the smaller hearts to decorate the larger outer circles on the pie’s crust. Finish by crimping the edge with a corkscrew!
-
Honeycomb Pie Crust
For a honeycomb pattern, cut out circles in the top crust with a pastry tip. Simple! You can trim the edges or you can fold and crimp.
-
Gobble Gobble Pie Crust
Using a picture of a turkey, recreate the body, neck/head and feathers in the dough with a paring knife. Cut out the pieces and assemble. This recipe was adapted from Kudos Kitchen by Renee.
-
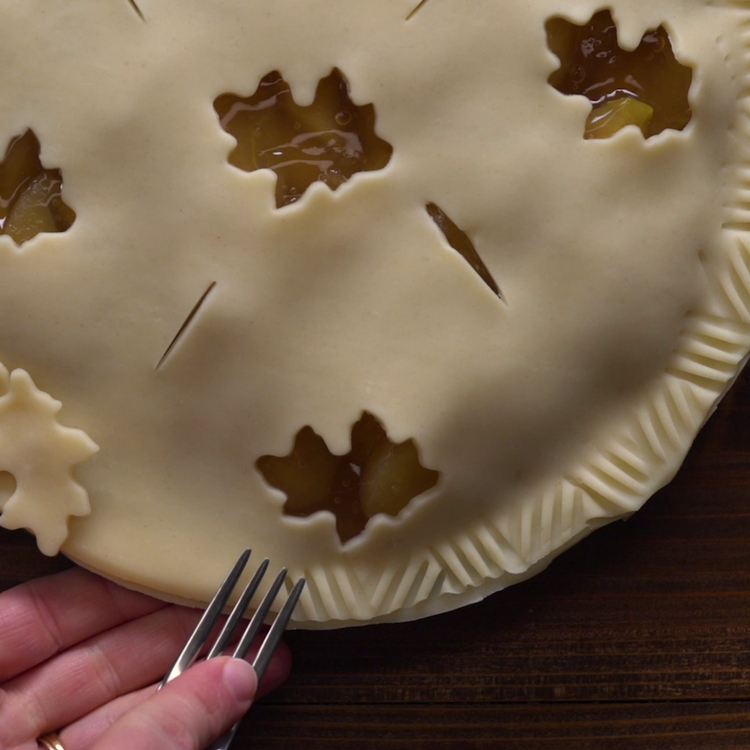
Fall Harvest Cut-Out Pie Crust
Use cookie cutters to make designs out of spare dough, then attach them with water. Think leaves or acorn patterns for the season! (Cut-outs are best done with the smallest cutters so the filling doesn’t burn.) Use a fork to crimp the edges.
-
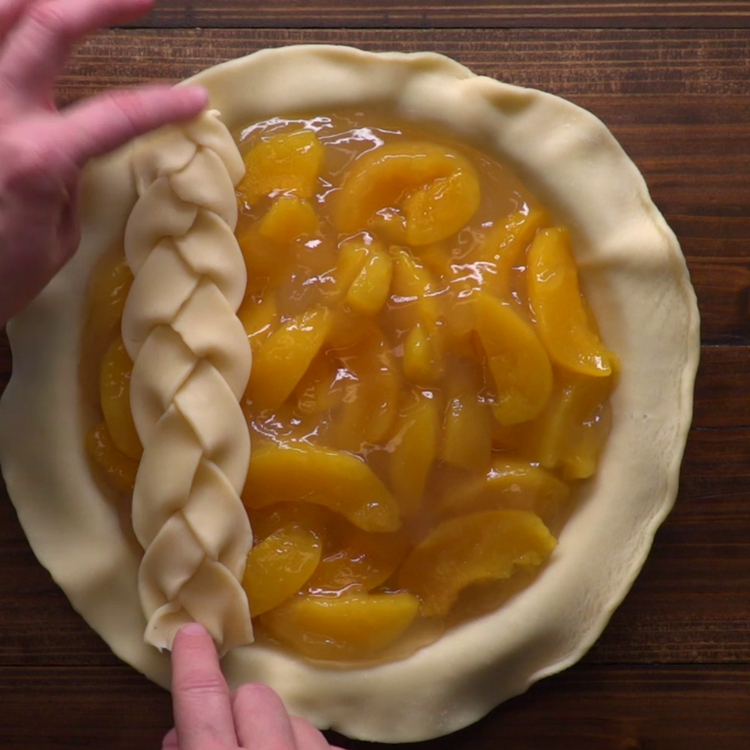
Braided Pie Crust
Make braids by cutting roughly 12-inch-long, 1/2-to-3/4-inch-thick strips of dough and braiding them together. Fold the crust over the top of the braids to secure them.
-
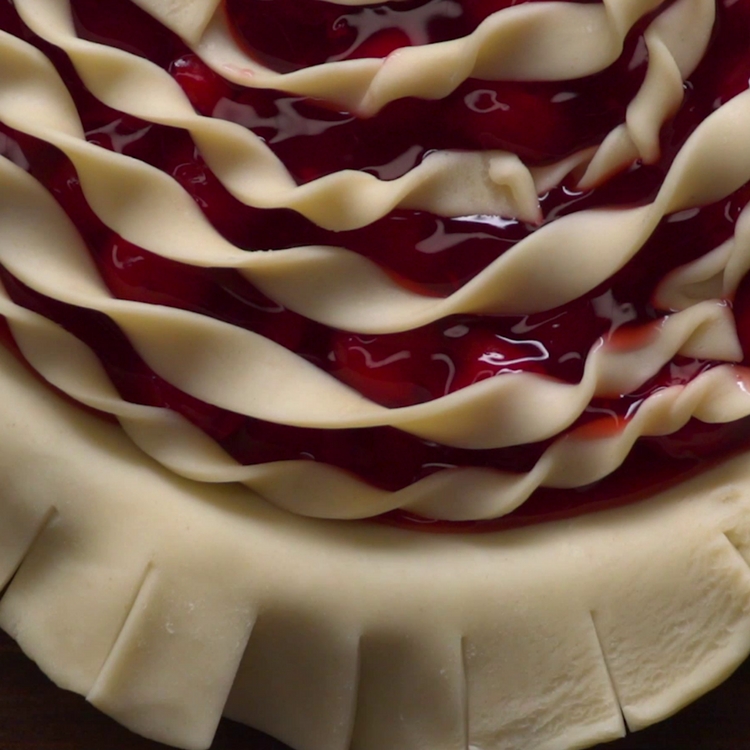
Swirling Pie Crust
Slice the dough into thin (1/4-inch-thick), even strips using a pizza cutter. Take a strip and twist the ends until the dough twirls up slightly. Start in the center and swirl the dough until it fills the entire pie with as many strips as needed! Use a small knife to make slices at the edge. Fold each section alternating over and under, towards the filling and outside of the pan. Trim the outer edge every half inch with the scissors.
-
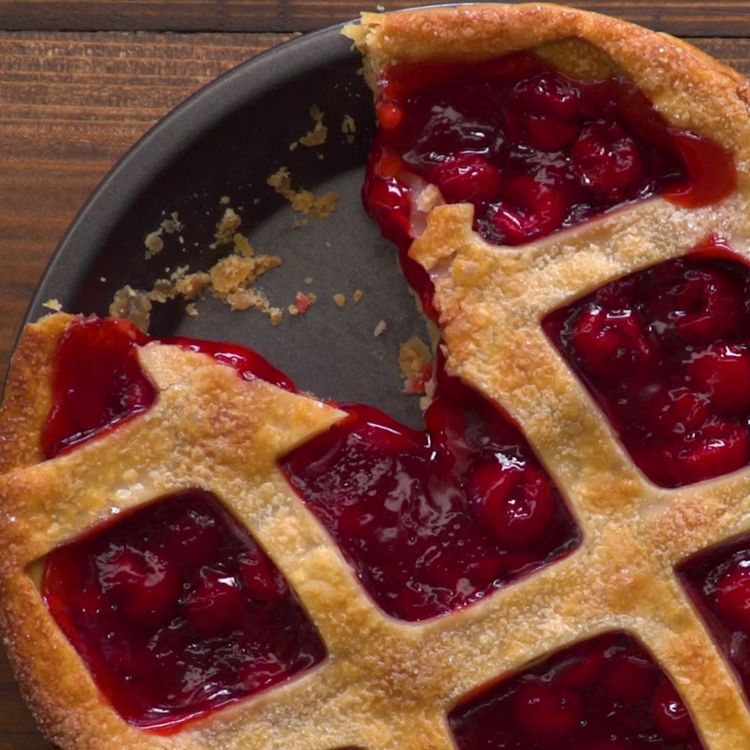
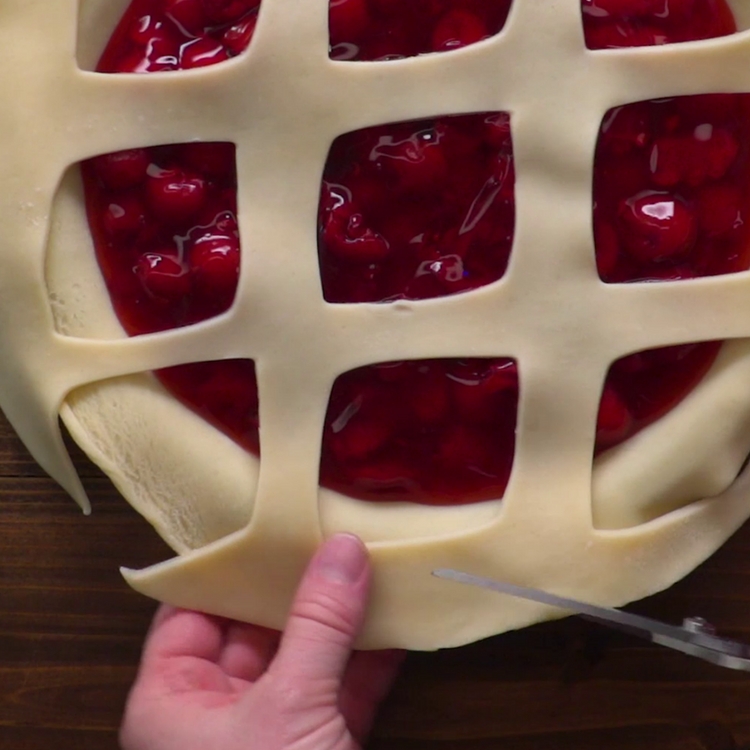
Faux Lattice Pie Crust
Save time on cutting strips for a traditional lattice pie crust. Use your favorite cut out design for this pie. Draw whatever shape you’d like and create your own stencil, like diamonds or squares!


Pastry Chef Tips
-
When cutting the dough strips for a few of these hacks, the strips will and should be longer than the dish.
-
Note that precision is NOT necessary. For example, when making the heart shapes, you can make as many different sizes as you’d like, or even make them upside down!
-
When you make braids for the pie, you can have as many braids as can fit. Nine strips make three braids, but four braids look beautiful too.
-
Hold onto the pie crust scraps you just trimmed. They may come in handy for mini pies or twists for jams.
-
When you’re working with the ready-made pie dough, it needs to warm up slightly. Take the chill out of the dough before working with it.
-
Brush each pie with a well-beaten egg and sprinkle sugar on top for a finished look.
We have more pie recipes for you too!
Dreaming about other fall recipes to help make that leap into colder temperatures?