You’ll feel like a sophisticated chocolatier when you present these cheesecake bites. Once you get over how delicious they look, the really ‘cool’ part is that they’re made in an ice cube tray.
No-bake cheesecake is already one of the most painless dessert recipes to pull off, but we found a way to make it even easier. Forget fancy molds and complicated chocolate tempering, because the only equipment this recipe calls for is your microwave and an ice cube tray–simple as that!
Each pretty truffle is filled with heavenly cheesecake that amazingly is made with only 7 ingredients. We’ll show you how to make three different scrumptious flavors–chocolate hazelnut, vanilla bean, and strawberry–but feel free to simplify your shopping list even further and just pick one.
Ice Cube Tray Cheesecake Bites
Makes 16 (depending on how many ice cubes your tray makes) Prep Time: 30 minutes Total Time: 2 hours
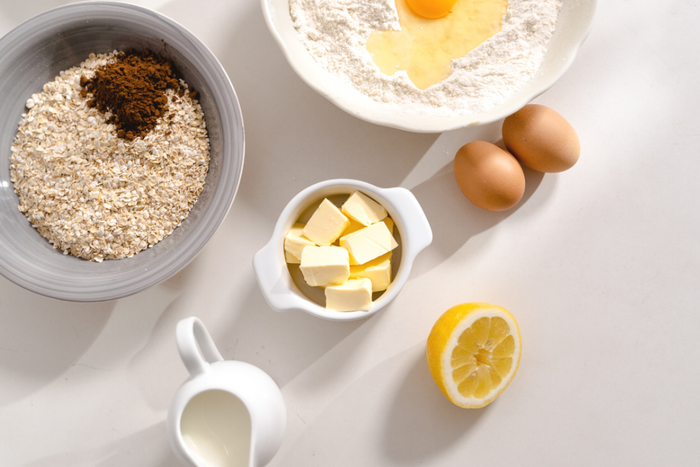
Ingredients
- 2½ cups milk or dark chocolate chips
- 2 Tablespoons coconut oil
- 8 ounces cream cheese, softened and divided in half
- 2 Tablespoons chocolate hazelnut spread
- 2 Tablespoons powdered sugar
- 1-inch piece of vanilla bean, scraped
- 2 ounces strawberry cream cheese, softened
Preparation
- Spray the ice cube tray lightly with cooking spray, and use a pastry brush to coat all of the sides up to the top of the tray. Also, use the brush to remove any excess cooking spray so there is not a pool in the bottom of the trays.
- Place the chocolate chips and coconut oil in a microwave safe measuring cup or bowl and microwave it in 30-second intervals, stirring between each interval, until the chocolate is melted. (This should take about 90 seconds, depending on your microwave.)
- Fill the ice cube tray about ⅓ full with the melted chocolate.
- Tilt and rotate the tray to make sure that the melted chocolate coats all of the sides of the tray.
- Freeze for 1-2 minutes until the chocolate has slightly thickened, but is still liquid.
- Tilt and rotate the tray again to make sure that the melted chocolate coats all of the sides of the tray with a thicker coat of chocolate this time, then allow the chocolate to set in the ice cube tray for 2-3 minutes until it is mostly set.
- While the chocolate is setting, prepare the fillings. To make the chocolate filling, mix half of the softened cream cheese with the chocolate hazelnut spread and stir until well combined. To make the vanilla bean filling, scrape the insides out of your 1-inch piece or vanilla bean and add it to the remaining half of the cream cheese. Add the powdered sugar and stir until well combined. To make the strawberry filling, stir the softened strawberry cream cheese until it’s smooth.
- To fill the chocolate shells, use about 1 to 1½ teaspoons of cheesecake filling per chocolate shell. Try to make sure that the filling stays in the center and does not touch the thinner side walls of the chocolate shells (or the chocolates may stick in those spots when they are unmolded).
- If needed, refresh the remaining melted chocolate by heating it in the microwave for 20-second intervals, stirring between each interval, until the chocolate is melted again. Pour the melted chocolate over the filling so that it’s completely covered.
- Tap the ice cube tray on the table to allow any air bubbles to escape and the chocolate to settle. If this exposes any filling, pour more melted chocolate to cover it.
- Clean any spilled chocolate off of the top of the ice cube tray so that you can see the partitions that separate the cubes. This will help prevent your chocolates from sticking together and help them to release from the tray when it is time to unmold them.
- Place the trays on a flat surface in the freezer for about an hour until the chocolate has hardened.
- Remove the trays from the freezer and allow them to come to temperature for about 5-10 minutes.
- Unmold the cheesecake bites by lightly twisting the ice cube tray as if you were trying to release ice. Turn the tray upside down over a sheet tray lined with wax paper or parchment paper to catch the chocolates. (You may need to lightly tap the bottom of the tray to coax the chocolates to release.)
Oh, the things you can do with an ice cube tray. We loved the way these turned out using a regular old ice cube rectangular tray, but if you have one that makes fun shapes, go for it.


