Bacon French Toast Roll-Ups
How do you improve a decadent brunch classic like French toast while also making it a more casual – and on-the-go! – affair? By wrapping it – literally – around the one thing that improves every food: bacon! When I went looking for a special-but-easy breakfast to make over a long weekend for my husband, I didn’t have to look far before I found the perfect one over on Recipe Tin Eats. These Bacon French Toast Roll-ups looked utterly delicious, and best of all, they turned out to be utterly easy. Read on to see how they come together and how you, too, can enjoy the perfect hand-held breakfast combination.
What I Used: The Ingredients
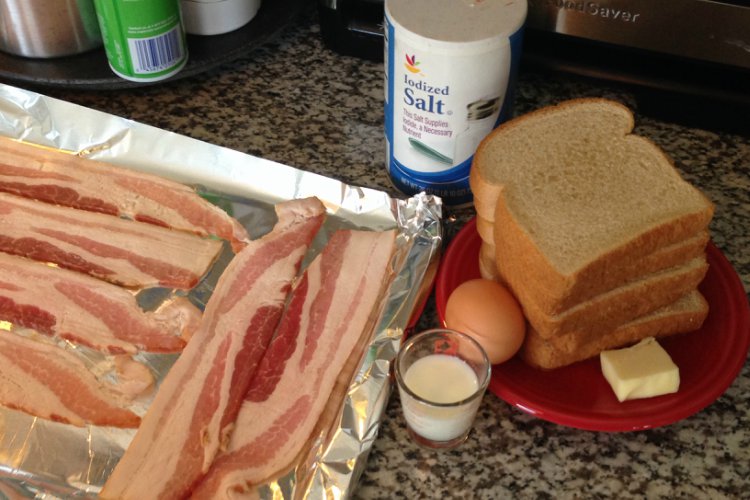
– 6 slices fresh, soft sandwich bread
– 6 slices bacon
– 1 tablespoon butter
– 1 large egg
– 2 tablespoons milk (whole or low-fat)
– Pinch of salt
Recipe Tin Eats’ original recipe calls for “streaky bacon,” which seems to be more of an important distinction outside of the U.S. I used regular, low-sodium bacon from the grocery store and it worked great! I also used a regular loaf of white sandwich bread, and while it worked fine, I think it would probably have worked even better with a fresh loaf of larger slices. So if you have access to a nice bakery, get your bread there!
What I Did: The Directions
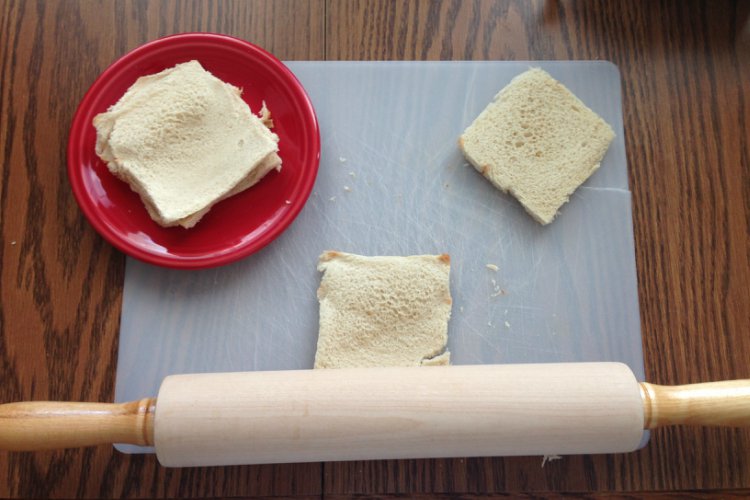
- Cut the crusts off each bread slice.
- Flatten each slice of bread by rolling a rolling pin over each one 3 or 4 times. It should be a bit sticky.
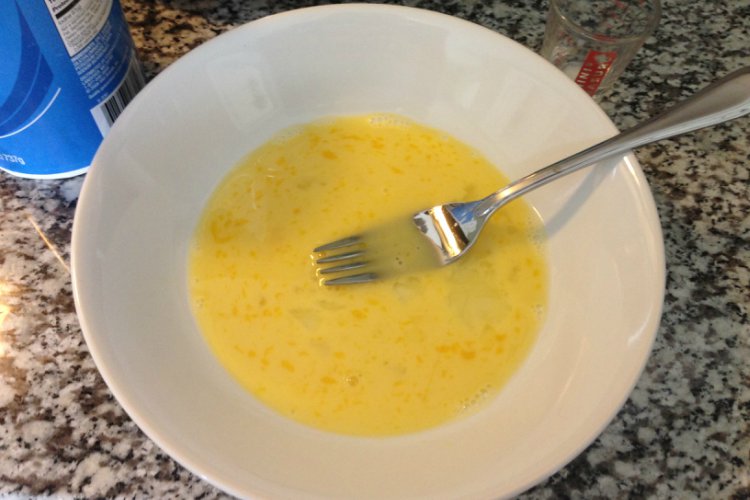
The stickiness is really only a (good!) problem with fresher breads. My grocery store bread flattened easily, and I had no problems with stickiness! - In a bowl large enough for a roll-up to lie flat, combine the egg, milk and salt and whisk with a fork.
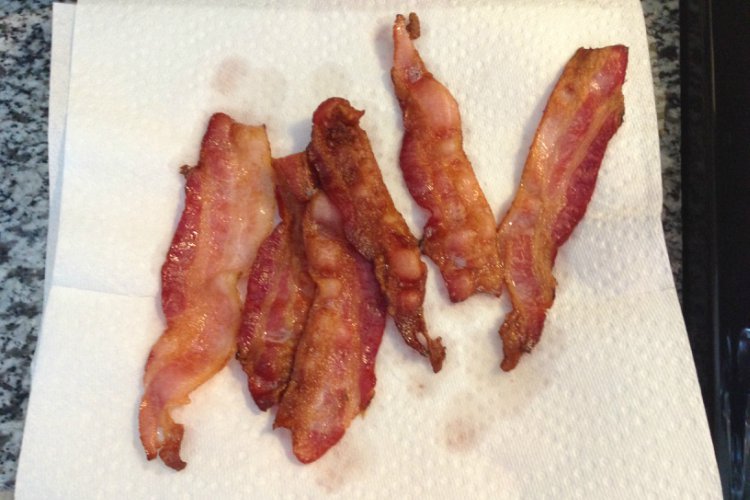
This step is where you mix your French toast coating. Recipe Tin Eats kept it really simple and so did I, but you can use your favorite mix here, with cinnamon or your other favorite spices. I’m definitely going to spice it up a bit when I make these again! - Heat a large pan over high heat. Place the bacon in the pan and sear each side until it is brown, but not too crispy. Crispy slices will fall apart when rolled-up!
So I actually decided to do something completely different for this step! Since the recipe called for bacon that was brown but not crispy, I baked it instead of frying it, and I have to say, it was the right call. Not only did baking it let me time the mixing of the egg mixture better and make the whole recipe more efficient, it also meant I didn’t have to worry about another pan or cleaning this one out. If you’ve never baked your bacon before, it’s easy! I cover a baking sheet with foil, arrange the bacon on the sheet, and then bake it for 15 minutes at 400 degrees Fahrenheit. Do not preheat your oven; start with a cold oven, put the bacon in, and turn it on. It may take up to 20 minutes, but mine was done in 15! - Wipe the pan clean (if you fried your bacon) and place the butter in the pan. Return to heat.
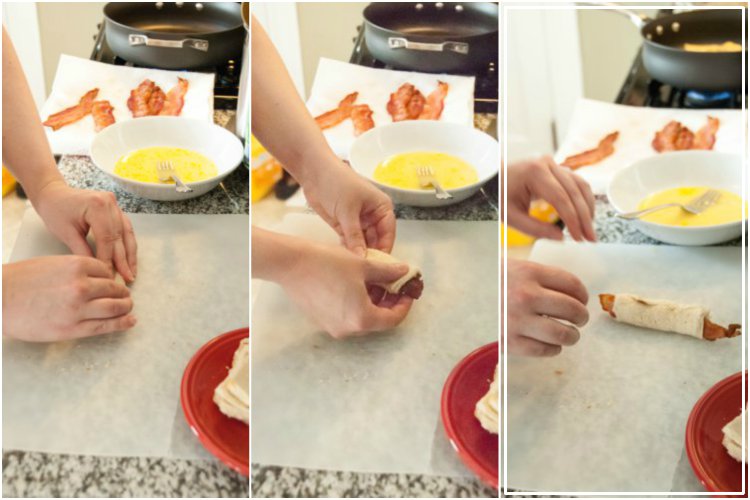
Since I baked my bacon, I didn’t have to worry about any wiping! I just grabbed my pan, put the butter in, and turned the burner to low-medium heat. I waited to turn the heat up to high, as in the original recipe, until I had some roll-ups ready to go . . . - Place a slice of bacon in the middle of each piece of bread. Roll up the bread, ending with the seam side down. Press down lightly to help it stay in place.
Because of the size of the bread slices I used, I didn’t have to roll much to get the bread around the bacon. Still, be reassured that even a small-to-standard size slice of bread will fit pretty perfectly around the bacon slice. - Roll a roll-up in the egg mixture, then shake off the excess. Wrap your first around it lightly and twist the roll up a few times, back and forth. This rubs the egg mixture into the roll-up and helps ensure the seam remains sealed. Repeat with the remaining roll-ups.
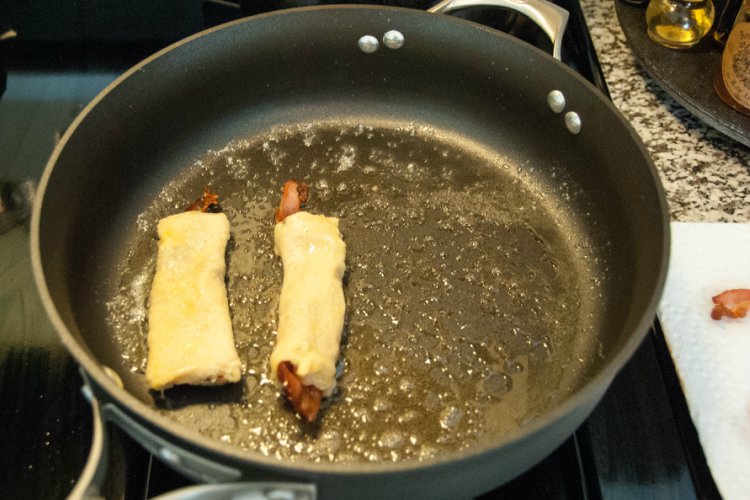
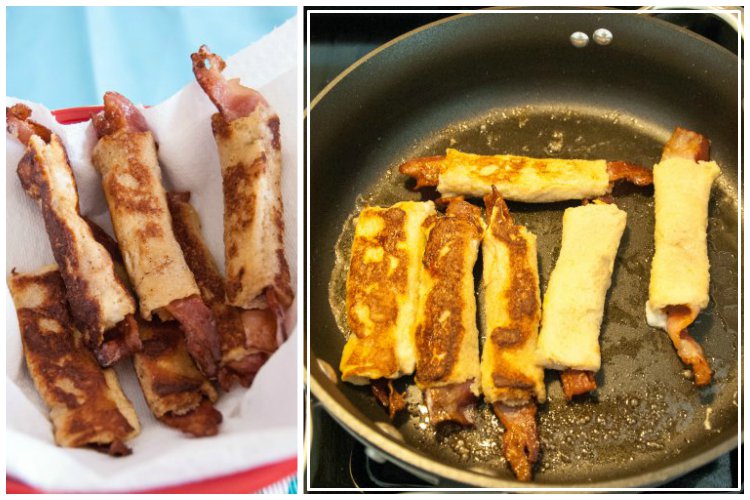
This step isn’t the most intuitive one – plus it feels a little weird! – but it’s easy. Essentially, just make sure your roll up is well coated in the egg mixture. You can do all the roll-ups at once if you have a place for them to rest, or you can do what I did and put them directly into your frying pan for the next step . . . - Place the roll-ups in the pan and cook over medium-high or high heat, rotating, for 3 to 4 minutes, until all sides are golden brown.
These guys cook up fast! I rolled each individual roll-up, coated it in the egg mixture and put it in the pan one at a time, rather than rolling every one, coating every one, etc., so this process just zipped by for me. You can do it however you feel comfortable, but it’s definitely a speedy process once you find your rhythm!
Recipe Tin Eats recommends eating these with a Nacho Cheese Dip, which – come on – is just obviously wrong! I kid, I kid, but my husband and I chose to eat these with some maple syrup instead, and it was just about the perfect breakfast. If we had been on-to-the-go this particular morning, I think they would have worked well, and they’re nicely proportioned for a satisfying-but-not-overwhelming start to the day. More importantly— they tasted great!
If you’re interested in trying these Bacon French Toast Roll-Ups, get your printable recipe over on Recipe Tin Eats. I think the only way it could be improved is if the egg mixture was spiced up with some cinnamon for even more of a traditional French toast taste, but they were delicious as is. What do you think? How will you make this recipe your own? Will you eat them with syrup, or are you going to try the recommended Nacho Cheese dip? Tell us how you try this recipe in the comments!


